


Integracja z InPost Pay

- Zobacz wszystkie warianty jako listę
| KOD | Forma płatności | Cena | ||
|---|---|---|---|---|

|
668
ss_inpost_pay
2026-06-24
1.1.1.7
|
1750.00 PLN
(Cena netto) |
||

|
711
ss_inpost_pay_sub_1Y
2026-06-24
1.1.1.7
|
700.00 PLN
/rok
(Cena netto) |
||

|
710
ss_inpost_pay_sub_1M
2026-06-24
1.1.1.7
|
70.00 PLN
/miesiąc
(Cena netto) |
- — 12 miesięcy gwarancji na wszystkie dodatki
- — sprzedajemy nasze dodatki na całym świecie
- — stabilne, elastyczne, wysokiej jakości produkty
- — konkurencyjne ceny, atrakcyjne rabaty
- — szybkie i kompetentne wsparcie techniczne
- — instalacja w 24h
- — indywidualne rozwiązania - moduły na zamówienie
Rozszerzenie do Store Builder oraz Multi-Vendor łączy Twój sklep z usługą InPost Pay i skraca drogę klienta do finalizacji zakupu niemal do jednego kliknięcia. Zamiast przechodzić przez pełny checkout, kupujący naciska przycisk InPost Pay na karcie produktu lub w koszyku, a dalej finalizuje zamówienie wygodnie w aplikacji InPost Mobile. Koszyk, dane dostawy i płatność synchronizują się w obie strony, więc to, co klient widzi w aplikacji, zawsze odpowiada stanowi koszyka w sklepie. Sklep odbiera gotowe zamówienie z kompletem danych klienta, wybranym paczkomatem lub adresem kuriera, a obsługa może wykonać zwrot bezpośrednio z poziomu zamówienia.
Najważniejsze funkcje
- Zakup przez InPost Pay niemal jednym kliknięciem, bez przechodzenia przez standardowy checkout sklepu.
- Dwukierunkowa synchronizacja koszyka, ceny i ilości po obu stronach nigdy się nie rozjeżdżają.
- Mapowanie metod dostawy InPost: paczkomat, kurier, dostawa cyfrowa, pobranie COD oraz paczka w weekend.
- Zwroty pełne i częściowe prosto z karty zamówienia, bez logowania do panelu InPost.
- Wspólne promocje i kody rabatowe widoczne także w aplikacji InPost, bez podwójnej konfiguracji.
- Wykluczanie wybranych produktów oraz całych kategorii z InPost Pay jednym zaznaczeniem.
- Silny podpis adresów API oparty na sekrecie instalacji, utwardzający komunikację przychodzącą od InPost.
- Pełne wsparcie Multi-Vendor oraz tryb sandbox i tester do bezpiecznych testów na produkcji.
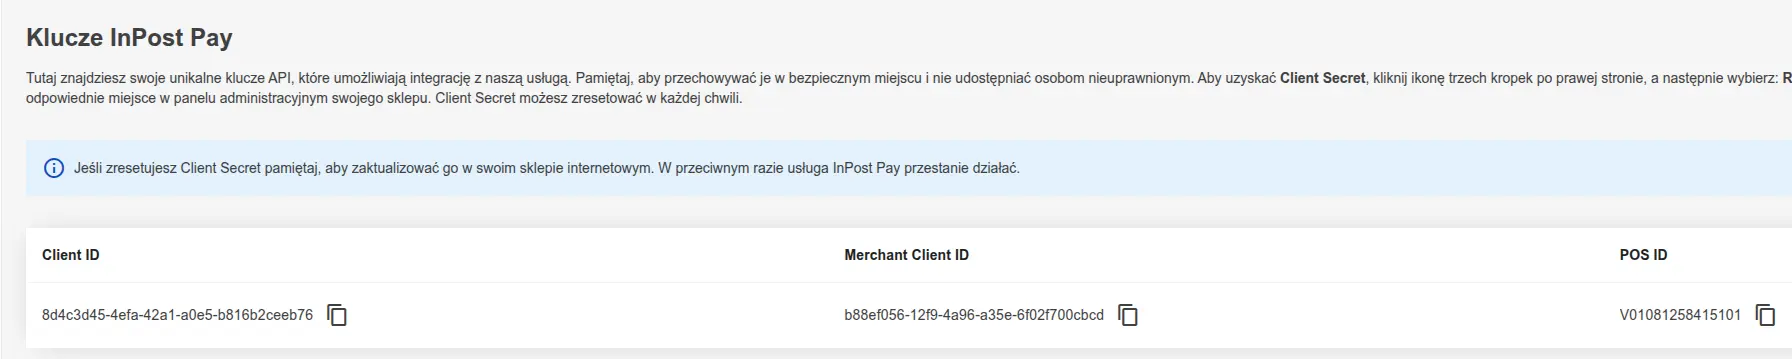
Konfigurację zaczynasz w jednym miejscu. Tutaj wprowadzasz klucze API osobno dla produkcji i dla piaskownicy (Client ID, Client secret, POS ID, Merchant Client ID oraz Merchant Secret), przełączasz tryb sandbox i decydujesz, czy widget widzą wszyscy klienci, czy tylko wybrani testerzy. Gotowa tabela z adresami Merchant Backend API, webhookami i linkiem testowym pozwala skopiować je wprost do portalu InPost Pay, bez ręcznego sklejania URL-i:
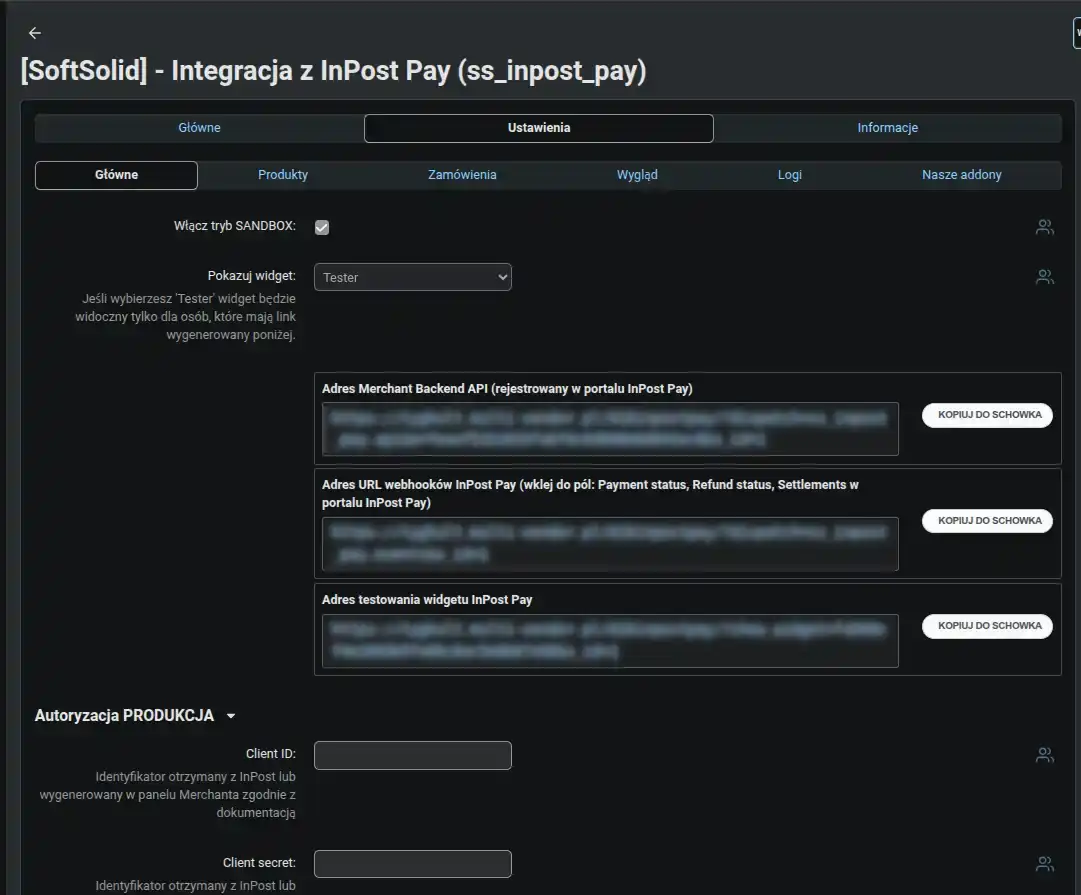
Zrzut ekranu 1
Komunikację przychodzącą od InPost możesz dodatkowo utwardzić. Opcja silnego podpisu sprawia, że sklep akceptuje wyłącznie nowy, mocny podpis adresów, którymi InPost odpytuje sklep, oparty na sekrecie Twojej instalacji. Domyślnie działają oba warianty podpisu, więc podmiana adresu Merchant Backend w portalu InPost przebiega bez przerwy w działaniu, a gdy nowy adres jest już potwierdzony, jednym przełącznikiem odcinasz starszy podpis:

Zrzut ekranu 2
W ustawieniach produktów wskazujesz, skąd dodatek ma pobierać kod EAN: z kodu produktu albo z wybranej cechy, której nazwę podajesz tuż obok. Decydujesz też, czy do aplikacji InPost trafia pełny czy skrócony opis towaru. Dzięki temu karta produktu w aplikacji wygląda dokładnie tak, jak chcesz, a kody EAN są pobierane z właściwego pola:
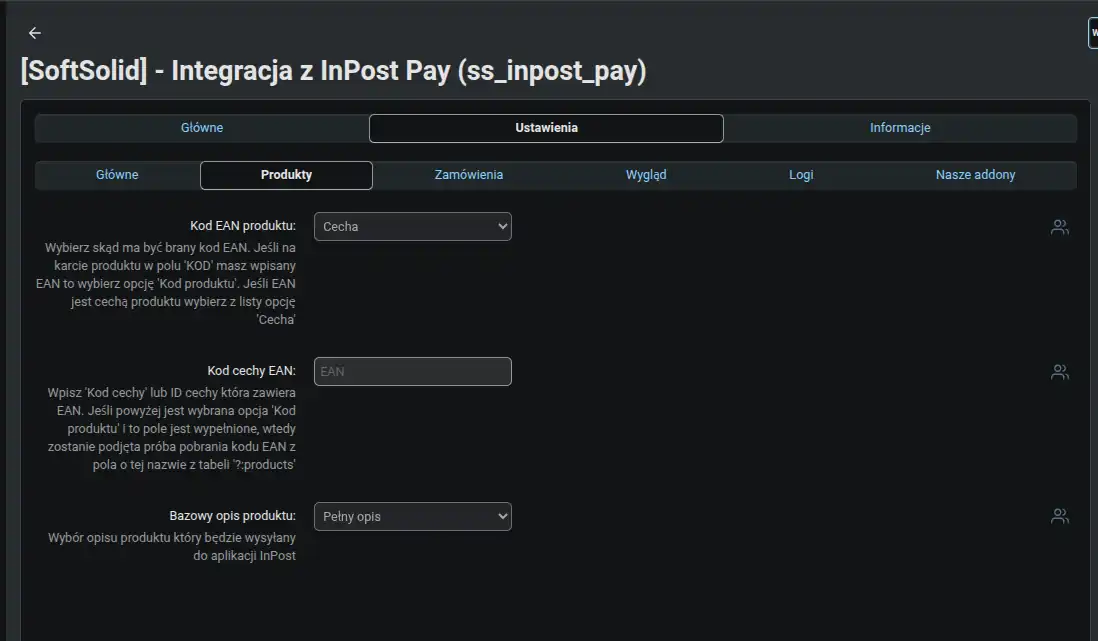
Zrzut ekranu 3
Ustawienia zamówień pozwalają wskazać status, jaki sklep nada zamówieniu opłaconemu przez InPost Pay. To prosty sposób, by zamówienia z tej ścieżki od razu wpadały na właściwy etap obsługi, na przykład jako opłacone, bez ręcznego przestawiania statusu przez obsługę:
Zrzut ekranu 4
W ustawieniach koszyka określasz, po ilu dniach wygasa koszyk zarejestrowany po stronie InPost, oraz próg, od którego klient otrzymuje darmową dostawę. Te dwa parametry porządkują doświadczenie zakupowe i pomagają zachęcić kupującego do większego zamówienia:

Zrzut ekranu 5
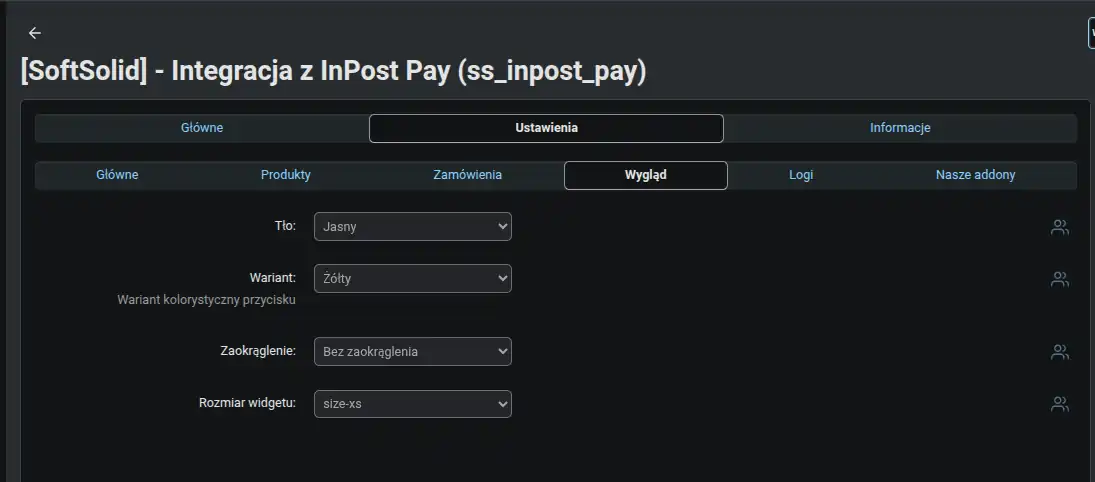
Wygląd przycisku InPost Pay dopasujesz do swojego sklepu bez dotykania szablonów. Ustawiasz tło, wariant koloru, zaokrąglenie narożników oraz rozmiar, tak aby przycisk spójnie wpisywał się w motyw strony i przyciągał uwagę we właściwym momencie:

Zrzut ekranu 6
Każdą metodę dostawy w sklepie mapujesz na odpowiednik w InPost Pay. Włączasz dostawę, wybierasz jej typ (paczkomat APM, kurier lub dostawa cyfrowa), ustawiasz pobranie COD wraz z ewentualną dopłatą, paczkę w weekend (PWW) oraz deklarowany czas dostawy. Wystarczy zrobić to raz, a dodatek dobierze właściwe opcje przy każdym zamówieniu:

Zrzut ekranu 7
Podobnie postępujesz z płatnościami. Dla każdej metody płatności w sklepie wskazujesz, które typy InPost Pay ma ona obsługiwać: kartę, BLIK, płatność linkiem, Google Pay, Apple Pay, pobranie i inne. Dzięki temu klient w aplikacji widzi dokładnie te formy zapłaty, które chcesz mu udostępnić:

Zrzut ekranu 8
Promocje ze sklepu mogą być widoczne także w aplikacji InPost. Przy danej promocji włączasz jej udostępnienie i wybierasz typ: wariant działający zarówno w sklepie, jak i w aplikacji, albo wariant pokazywany wyłącznie w aplikacji. Ten sam silnik promocji obsługuje obie ścieżki, więc nie konfigurujesz niczego dwa razy:

Zrzut ekranu 9
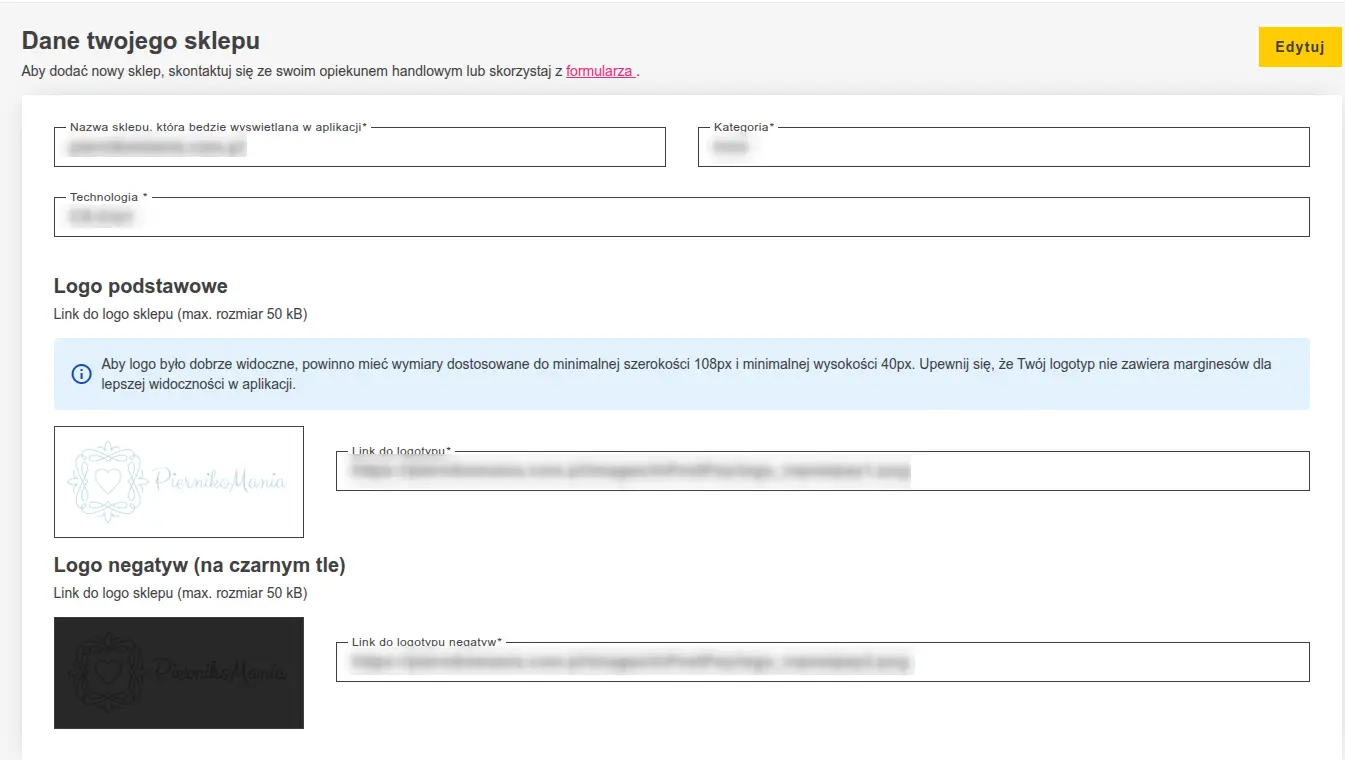
Strony sklepu z regulaminami możesz oznaczyć jako zgody prezentowane w aplikacji InPost. Wskazujesz, że dana strona pełni rolę zgody, ustalasz jej typ (wymagana jednorazowo, wymagana zawsze lub opcjonalna) oraz wersję. To prosta droga do zachowania zgodności z polityką InPost i wymogami prawnymi:
Zrzut ekranu 10
Na karcie produktu możesz oznaczyć towar jako powiązany z InPost Pay. To ustawienie pozwala precyzyjnie wskazać, dla których produktów ścieżka InPost Pay ma być aktywna, dając Ci kontrolę nad zasięgiem integracji w katalogu:
Zrzut ekranu 11
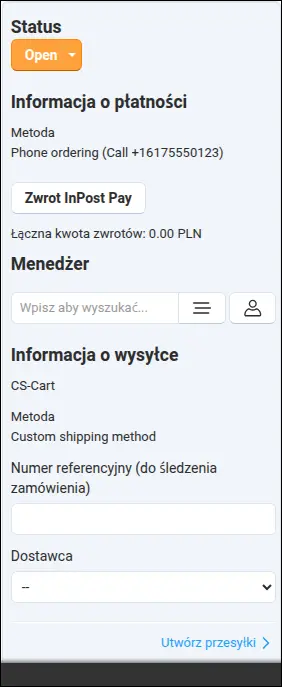
Zamówienie złożone przez InPost Pay rozpoznasz od razu w panelu. Karta zamówienia pokazuje jego status, informację o płatności, przycisk uruchamiający zwrot oraz łączną kwotę dotychczasowych zwrotów. Obsługa ma cały kontekst w jednym miejscu, bez przełączania się między systemami:
Zrzut ekranu 12
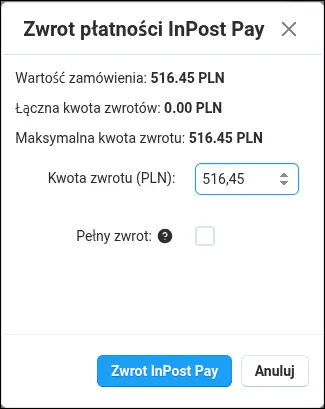
Zwrot wykonujesz w wygodnym oknie, bez logowania do panelu InPost. Formularz pokazuje wartość zamówienia i maksymalną kwotę zwrotu, pozwala wpisać dowolną kwotę lub zaznaczyć zwrot pełny, a następnie jednym przyciskiem wysyła żądanie do InPost. Zwrot trafia do historii i jest dostępny przy zamówieniu:
Zrzut ekranu 13
Dziennik zdarzeń integracji zbiera logi z poziomem ważności, nazwą akcji oraz dispatchem, którego dotyczą. To narzędzie do szybkiej diagnostyki: gdy coś wymaga uwagi, obsługa od razu widzi, co i kiedy się wydarzyło, bez przeszukiwania plików serwera:
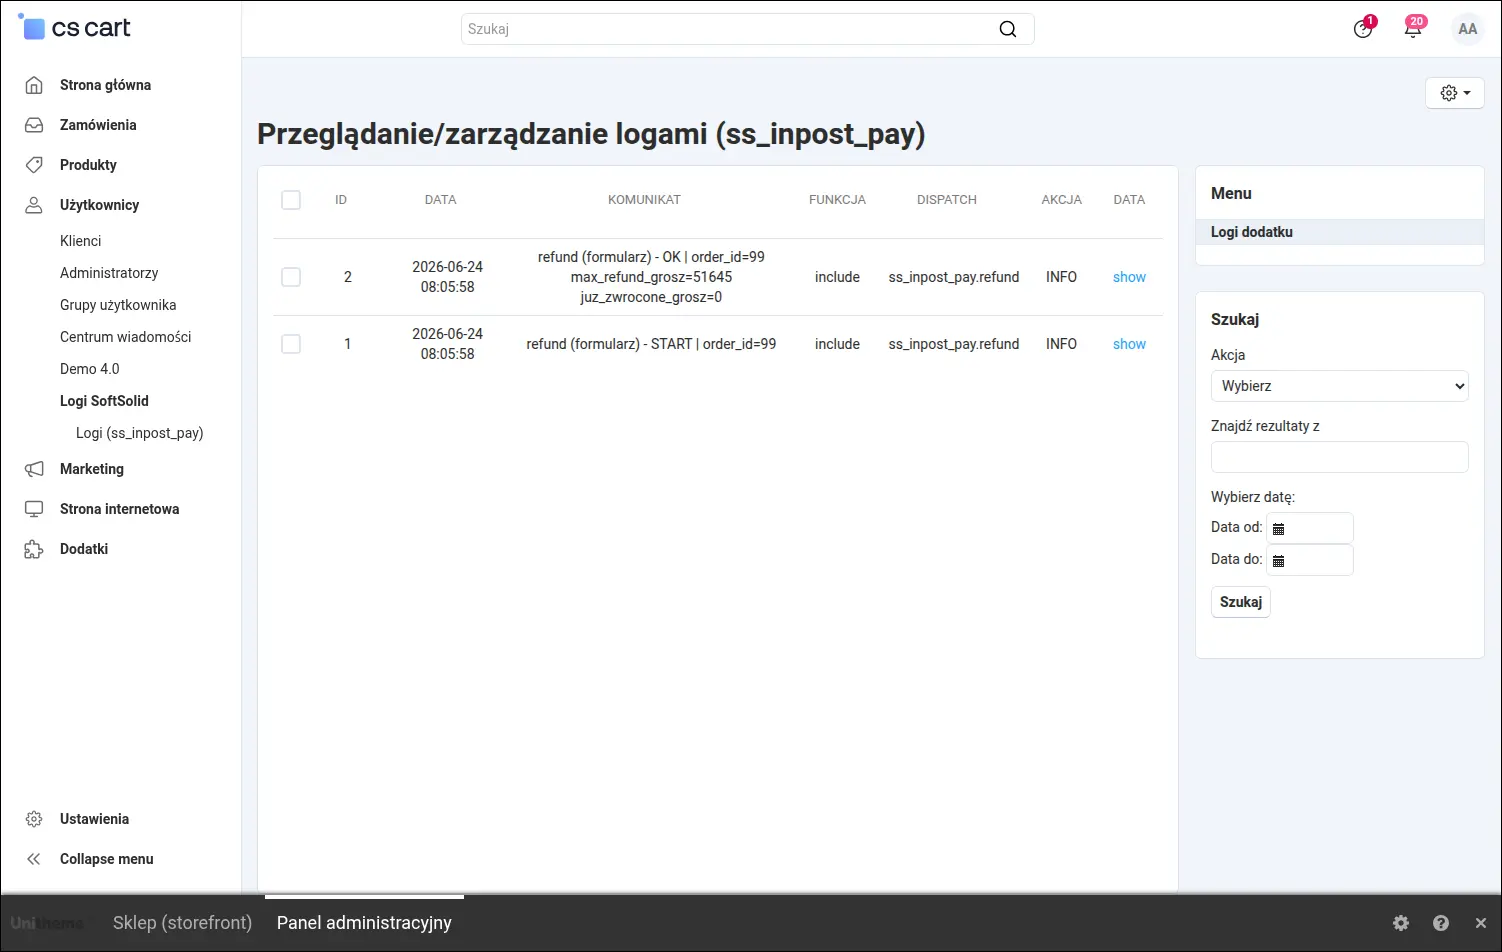
Zrzut ekranu 14
Na froncie, na karcie produktu, przycisk InPost Pay pojawia się obok standardowych przycisków zakupu. Klient może dodać towar do koszyka InPost wprost z poziomu karty i od razu ruszyć w stronę szybkiej finalizacji, zamiast przechodzić całą klasyczną ścieżkę zamówienia:
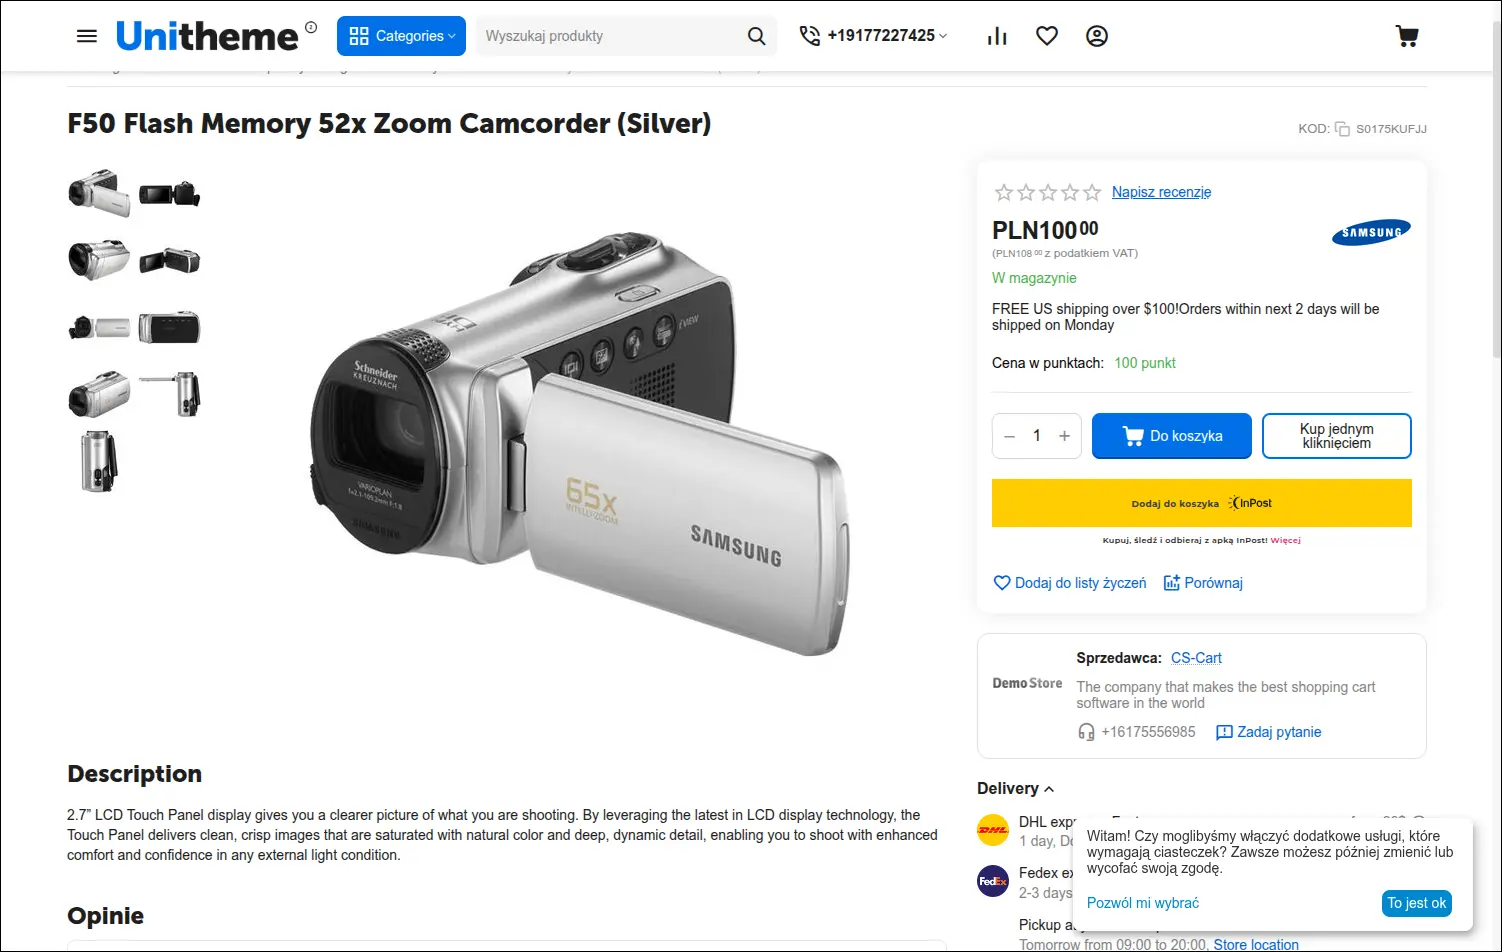
Zrzut ekranu 15
W koszyku, w podsumowaniu zamówienia, przycisk InPost Pay zaprasza do zakupu z InPost. Po jego kliknięciu klient finalizuje zamówienie w aplikacji InPost, gdzie ma pod ręką dane dostawy, paczkomat i metodę płatności, a sklep odbiera gotowe zamówienie bez dodatkowej pracy obsługi:
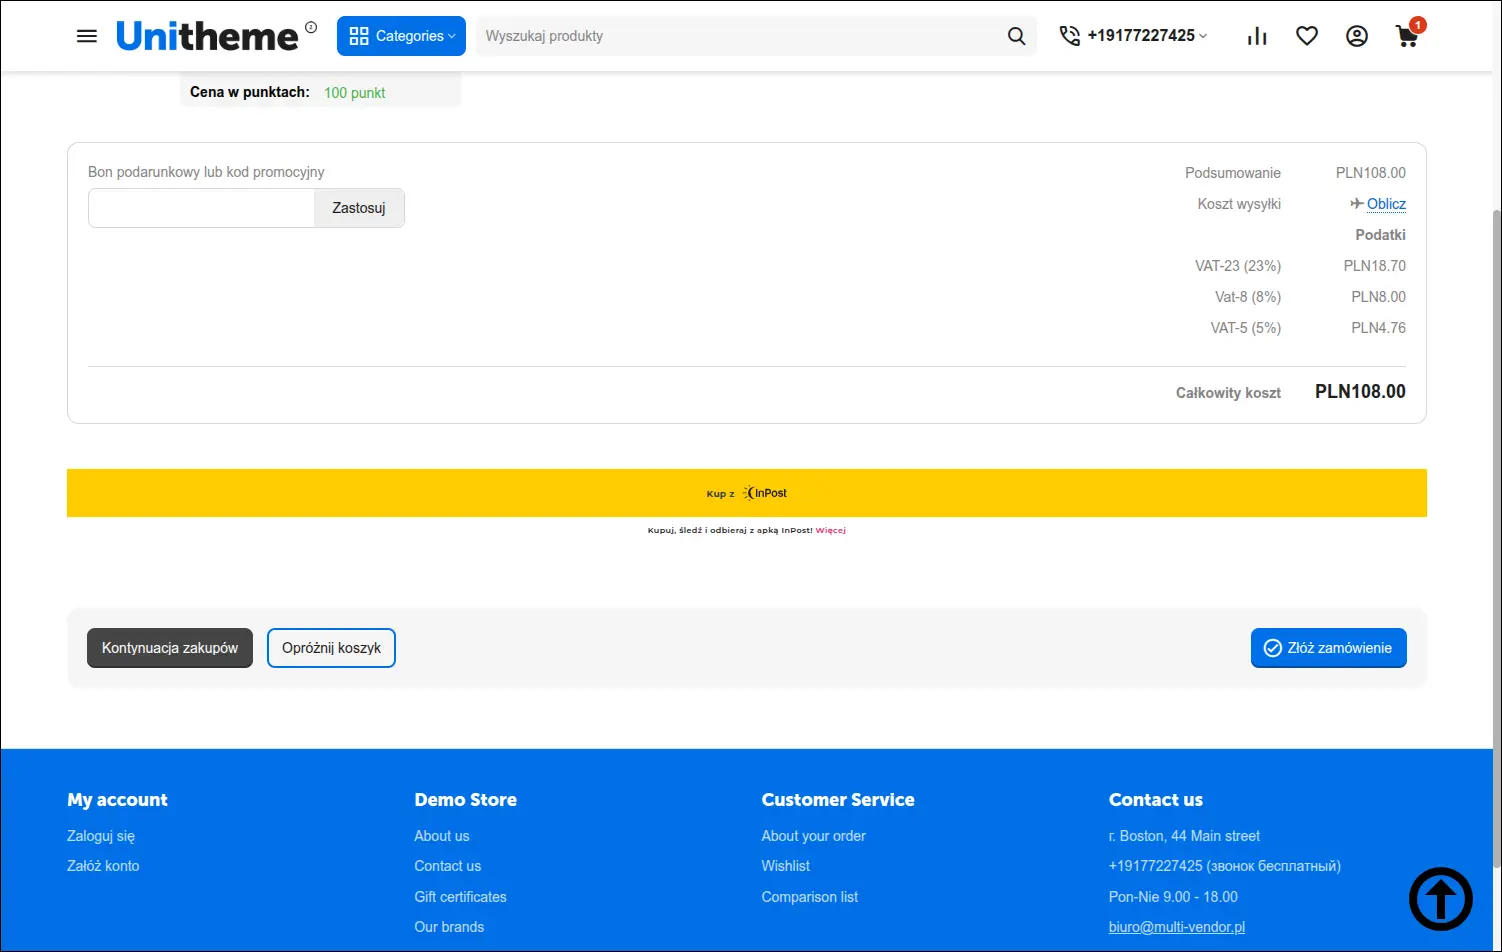
Zrzut ekranu 16
Nie każdy towar nadaje się do wysyłki przez InPost. Na karcie produktu, w sekcji InPost Pay, zaznaczasz opcję wykluczenia, a przycisk InPost Pay znika z karty tego produktu i z koszyka, gdy tylko produkt się w nim znajdzie. Klient nie utknie na ścieżce, której InPost i tak by nie obsłużył:

Zrzut ekranu 17
To samo wykluczenie ustawisz na całej kategorii. Zaznaczenie opcji przy kategorii obejmuje wszystkie produkty z jej poddrzewa, więc całe grupy asortymentu wyłączysz z InPost Pay jednym ruchem, bez oznaczania towarów po jednym:

Zrzut ekranu 18
Integracja z InPost Pay to wygodniejszy, krótszy zakup dla klienta i mniej pracy dla obsługi sklepu. Dwukierunkowa synchronizacja, mapowanie dostaw i płatności, wspólne promocje, zwroty z poziomu zamówienia, wykluczanie wybranego asortymentu oraz pełne wsparcie Multi-Vendor sprawiają, że cała ścieżka, od koszyka po zwrot, działa spójnie i bez ręcznego sklejania danych.
Zapraszamy do kontaktu i zakupu!
Wybierz najbardziej korzystaną dla siebie formę płatności za dodatek. Możesz zapłacić raz i korzystać z dodatku. Wybranie płatności subskrypcyjnej (miesięcznej lub rocznej) oznacza, że za dodatek płaci się w regularnych interwałach czasu i ma się dostęp do najnowszych wersji addona oraz wsparcia technicznego.
- Płatność jednorazowa
- Store Bulider
- Multi-Vendor
- 4.21.x
- 4.20.x
- 4.19.x
- 4.18.x
- 4.17.x
- 4.16.x
- 4.15.x
- Bez zmian w kodzie
Nie znaleziono opinii